Last Updated on February 7, 2026 by maryamnawaz
Table of Contents
Introduction
Baseboards are an essential finishing touch that can elevate the look of any room. While they may seem minor, properly installed baseboards provide a polished appearance and protect walls from scuffs and damage.
Whether renovating an entire home or just updating a single room, understanding how to install baseboards properly can make a significant difference.
Whether a DIY enthusiast or a beginner tackling your first home improvement project, this comprehensive guide will walk you through Baseboard Installation through the tools, techniques, and tips needed to install baseboard Installation like a pro.
| Category | Key Details | Benefits |
| Importance of Baseboards | It enhances aesthetics, protects walls from damage, and increases home value. | Provides a clean, polished, and cohesive appearance. |
| Materials | Wood (durable), MDF (affordable), PVC (moisture-resistant), Composite (versatile). | Choose based on durability, budget, and style preferences. |
| Styles | Modern (flat designs), Classic (ornate profiles), Tall baseboards for high ceilings. | Complements room decor and proportions. |
| Tools Needed | Miter saw, measuring tape, nail gun/hammer, caulk, wood filler, sandpaper, adhesive. | Ensures proper installation with precision and ease. |
| Preparation | Measure walls, remove old baseboards, and clean and patch surfaces. | Creates a clean workspace for accurate installation. |
| Installation Process | Cut baseboards to size, secure them with nails, handle corners with miter or coping cuts, and fill gaps. | Achieves a professional and seamless finish. |
| Advanced Techniques | Add secondary trims, create shadow gaps, or paint in contrasting colors. | Elevates design and adds a unique touch. |
| Common Challenges | Uneven walls (use caulk), misaligned cuts (adjust during dry-fitting), gaps in joints (fill with caulk). | Addresses imperfections for a polished result. |
| Maintenance | Regular cleaning, touch-up paint for scuffs, and periodic re-caulking. | Keeps baseboards looking fresh and well-maintained. |
Why Install Baseboards?

Baseboards serve both functional and aesthetic purposes:
- Protection: They shield walls from furniture, vacuum cleaners, and general wear and tear.
- Aesthetic Appeal: Baseboards seamlessly transition between walls and floors, adding character to your space.
- Value Addition: Professionally installed baseboards can increase the value of your home by enhancing its overall appearance.
Tools and Materials Needed
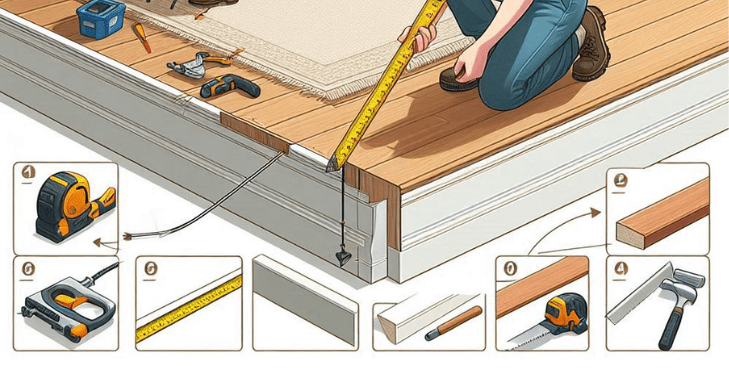
Before starting your baseboard installation project, gather the necessary tools and materials to ensure efficiency and precision.
Essential Tools
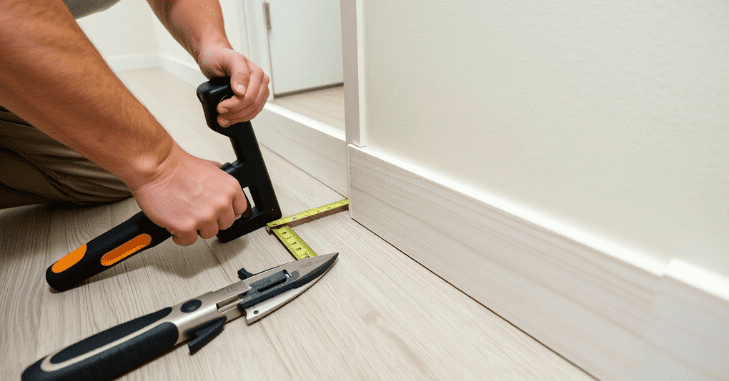
- Tape Measure – For accurate measurements of walls and baseboards.
- Miter Saw – Ideal for cutting precise angles for corners.
- Brad Nailer or Nail Gun – Speeds up the nailing process compared to a hammer.
- Stud Finder – Locates studs for secure nailing.
- Level – Ensures baseboards are straight.
- Sandpaper (100-180 grit) – Smooth cuts and edges.
- Painter’s Tape – Protects walls and floors during painting or caulking.
- Coping Saw – For intricate cuts in inside corners.
- Caulking Gun – Applies caulk to seal gaps.
Required Materials
- Baseboards (add 10% extra for waste).
- Finish nails (16-gauge recommended).
- Wood glue or construction adhesive.
- Caulk (paintable).
- Wood filler for nail holes.
- Paint or stain.
Step-by-Step Guide to Baseboard Installation
1. Prepare Your Space
- Remove old baseboards (if applicable) using a pry bar or utility knife.
- Clean the walls and floor to remove dust or debris.
- Repair any wall imperfections with spackle or putty.
2. Measure Your Walls
Use a tape measure to determine the length of each wall. Add 10% to your total measurement for waste due to cuts or errors.
3. Cut Your Baseboards
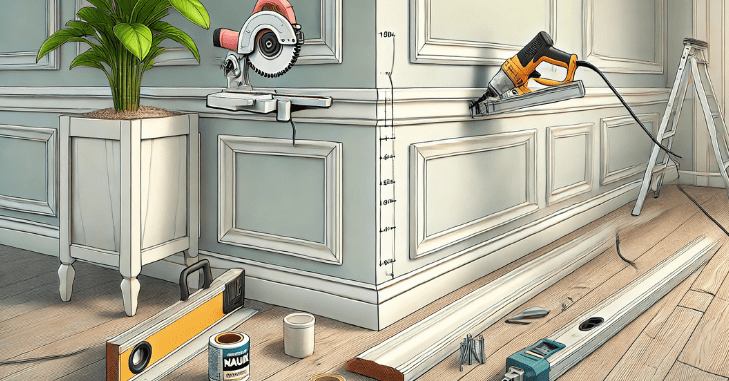
To achieve precise cuts for your baseboards, use a miter saw to cut them at 45-degree angles for corners. For inside corners, consider coping instead of mitering, as this technique ensures a snug fit that enhances the overall appearance.
Additionally, after cutting each piece, it’s helpful to label them to avoid confusion during installation, making the process smoother and more efficient.
4. Paint or Stain Before Installation
Painting or staining baseboards before installation saves time and ensures clean edges:
- Apply one coat of primer followed by two coats of paint or stain.
- Allow each coat to dry completely before handling.
5. Dry-fit the Baseboards
Place the baseboards against the wall without nailing them to ensure proper fit:
- Check for gaps caused by uneven floors.
- Trim pieces as needed for precise alignment.
6. Attach the Baseboards
- Use a stud finder to locate studs along the wall.
- Secure the baseboard with a brad nailer, driving nails into studs at an angle for stability.
- Use scarf joints (angled cuts) for long walls to join two pieces seamlessly.
7. Fill Gaps and Nail Holes
- Apply wood filler over nail holes and sand smooth once dry.
- Use caulk to fill gaps between the wall and baseboard for a polished look.
8. Touch-Up Paint
After installation, touch up any scuffs or exposed wood with paint or stain.
Tips and Tricks for Flawless Installation
1. Batch Your Processes
Measure all walls at once, cut all pieces together, and install them in one go to save time.
2. Use MDF Baseboards
Medium-density fiberboard (MDF) is easier to cut than wood and less prone to warping on uneven floors.
3. Cope Inside Corners
Coping ensures tight joints inside corners by cutting away excess material at an angle.
4. Avoid Over-Nailing
Too many nails can damage baseboards or make them difficult to remove later.
5. Account for Uneven Floors
Use shims under the baseboard or sand down high spots on the floor for uneven floors.

Common Challenges and How to Overcome Them
Uneven walls can create small gaps between the baseboard and the surface, but these can be easily addressed by applying caulk to fill and smooth the spaces. Misaligned cuts, often caused by inaccurate measurements, can be avoided by double-checking dimensions before cutting and slightly adjusting during dry-fitting.
Applying wood glue before nailing ensures a secure bond for gaps in joints where baseboard pieces meet, while caulk or wood filler can be used after installation to create a seamless finish.
Creative Baseboard Design Ideas
Baseboards don’t have to be boring! Here are some design ideas:
- Modern Minimalism: Simple, flat baseboards with sharp edges create a sleek look.
- Traditional Elegance: Opt for tall baseboards with decorative profiles for classic charm.
- Two-Tone Baseboards: Paint the top trim one color and the lower section another for contrast.
- Rustic Wood: Stain wooden baseboards in natural tones for a farmhouse aesthetic.
Enhancing Baseboards with Finishing Touches
To elevate the appearance of baseboards even further, consider adding subtle finishing touches that complement your room’s décor. Decorative molding or quarter-round trim can be installed along the bottom edge to hide small gaps and create a polished look. For painted baseboards, lightly sanding between coats ensures a smoother finish, while using a satin or semi-gloss paint provides durability and makes cleaning easier.
Additionally, integrating LED strip lighting along the top or bottom edge of the baseboard can add an elegant, modern ambiance to hallways or living spaces.
Safety Tips
- Wear safety goggles when using power tools like miter saws.
- Use ear protection when operating noisy equipment like nail guns.
- Keep your workspace well-lit and free of clutter to prevent accidents.
Cost Breakdown
Installing baseboards is an affordable way to enhance your home:
- Materials: $40–$50 per room (baseboards, nails, caulk).
- Tools: $100–$200 if purchasing tools like miter saws or nail guns (can be rented).
- Time: 2–3 days per room (including drying time for paint).
Benefits of DIY Baseboard Installation
- Saves money compared to hiring professionals.
- Allows customization of design and materials.
- Provides a sense of accomplishment upon completion.
Conclusion
Baseboard installation is a rewarding project that enhances both the functionality and aesthetics of your home’s interior spaces. By following this step-by-step guide, gathering the right tools, and applying these tips and tricks, you can achieve professional-looking results even as a beginner.
Whether upgrading existing trim or installing new ones from scratch, remember that patience, precision, and preparation are key to turning your vision into reality!
Apart from that if you want to know about “Memory Foam vs. Hybrid Mattresses: Which One Matches Your Sleep Style?” then please visit our “Home Improvement” Category.
FAQs
You’ll need a miter saw, measuring tape, nail gun or hammer, caulk, wood filler, and sandpaper.
Yes, a hammer and finishing nails can be used, though a nail gun is faster and more precise.
You can do either, but painting before installation helps avoid mess and ensures even coverage.
Use caulk to fill small gaps, or scribe the baseboard to match uneven surfaces.

