


Last Updated on June 30, 2026 by maryamnawaz
Table of Contents
Introduction
Crown moulding can elevate the aesthetic appeal of any room, adding a touch of elegance and sophistication. While the thought of installing crown moulding might seem daunting, with the right tools, techniques, and expert tips, you can achieve a professional look in your home.
Crown moulding is a beautiful addition to any home, elegantly enhancing the transition between walls and ceilings. While it may seem like a daunting task, installing crown moulding can be a manageable DIY project with the right tools, techniques, and expert advice.
This comprehensive guide will walk you through the process of How to Install Crown Moulding?, from selecting the right materials to the final installation.
| Category | Details |
| Essential Tools | Miter saw, coping saw, measuring tape, level, nail gun, caulk gun, sandpaper, stud finder. |
| Materials Needed | Crown moulding, finishing nails, wood glue, caulk, primer, paint/stain |
| Preparation Steps | Measure walls, mark stud locations, cut test pieces, and gather all tools and materials. |
| Cutting Techniques | Use mitre cuts for corners, cope inside corners, and ensure precise angles with a mitre saw. |
| Installation Process | Start from the longest wall, secure moulding with nails, and apply adhesive for extra hold. |
| Finishing Touches | Fill nail holes, caulk gaps, sand rough edges, and apply paint or stain for a polished look. |
| Common Mistakes to Avoid | Incorrect angles, not using a level, skipping caulking, using the wrong nails. |
| Expert Tips | Use a coping saw for inside corners, cut slightly longer for a tight fit, and always test fit before nailing. |
Understanding Crown Molding
Crown moulding is a decorative trim that is installed where the walls meet the ceiling. It serves both functional and aesthetic purposes by hiding imperfections in the junction and adding a finished look to the room. Crown moulding comes in various styles, sizes, and materials, making it a versatile choice for different interior designs.
Types of Crown Molding
- Wood: Provides a classic look; can be stained or painted.
- MDF (Medium-Density Fiberboard): A cost-effective option that is easy to work with and paint.
- Polyurethane: Lightweight and resistant to moisture, ideal for areas with high humidity.
- Plaster: Offers a traditional feel but is heavier and more challenging to install.


How to Install Crown Moulding? Essential Tools for Installation
Having the right tools is crucial for a victorious crown moulding installation. Here’s a list of essential tools you’ll need:
- Miter Saw: This is used to make precise angled cuts.
- Measuring Tape: To measure lengths accurately.
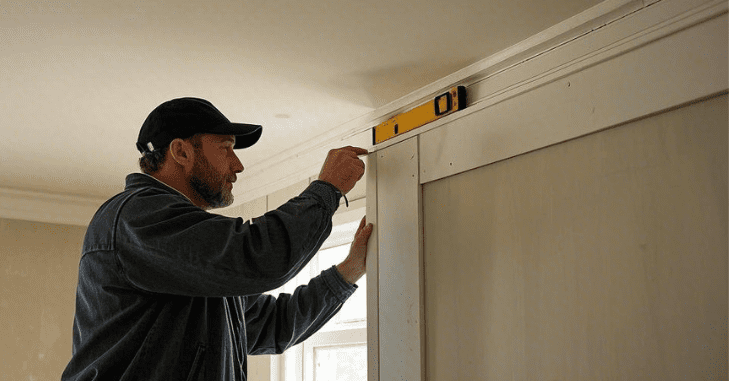
- Level: Ensure the moulding is straight.
- Stud Finder: Helps locate wall studs for secure installation.
- Nail Gun or Hammer: This is used to attach the moulding to the wall and ceiling.
- Wood Glue: Provides additional support for joints.
- Caulk and Caulking Gun: This is used to fill gaps and seams.
- Paintbrush and Paint: For finishing touches.
Choosing the Right Crown Molding
Selecting the right crown moulding can significantly impact the overall look of your room. Consider the following factors:
Style and Design
Choose a style that complements the existing decor. For traditional interiors, select ornate designs, while modern spaces may benefit from more straightforward, sleeker profiles.
Size
The size of the crown moulding should be proportionate to the room’s dimensions. Taller ceilings can handle broader and more elaborate mouldings, while smaller rooms may look best with narrower profiles.
Material
When selecting the material, consider the room’s humidity levels and your budget. Wood is ideal for dry areas, while MDF or polyurethane is better for humid spaces like bathrooms.
Preparation for Installation
Preparation is key to a successful installation. Follow these steps to get ready:
Gather Materials and Tools
Before starting, make sure all tools and materials are on hand. This will save time and frustration during the installation process.
Clear the Area
Remove any furniture, decor, or fixtures that may obstruct your work area. This creates a safe and spacious environment for installing crown moulding.
Measure the Room
Use a measuring tape to determine the lengths of crown moulding needed for each wall. It’s wise to measure multiple times to ensure accuracy.
Measuring and Cutting Crown Molding
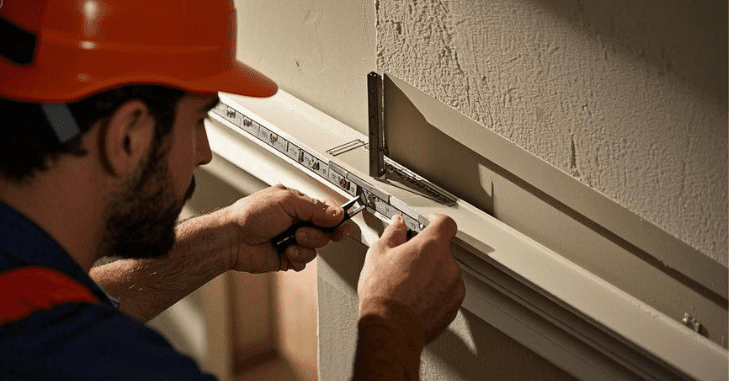
Accurate measurements and cuts are essential for a seamless installation of crown moulding. Start by measuring the length of each wall and accounting for any corners or angles, recording the measurements carefully—remember the adage, “Measure twice, cut once.”
Next, you’ll need to make mitre cuts at the corners for a clean joint; set your mitre saw to a 45-degree angle for both inside and outside corners. Additionally, adjust the bevel of the saw for crown moulding, ensuring that the crown rests flat against the saw table, typically at a 33.9-degree angle for most standard profiles.
Finally, before nailing any pieces in place, perform a dry fit in the corner to ensure they fit correctly and make adjustments as necessary.
Techniques for Installing Crown Molding
Now that you have prepared and cut your crown moulding, it’s time to install it. Here are the steps to follow:
Start with the Longest Wall
Begin the installation on the longest wall. This will help minimize visible seams and make the installation process smoother.
Nail the Molding into Place
Using a nail gun or hammer, attach the crown moulding to the wall and ceiling. Drive nails at an angle through the moulding into the wall studs for a secure fit. Space the nails about 12 inches apart.
Use Wood Glue
For added strength, apply wood glue to the back of the moulding before nailing it in place. This helps prevent gaps and provides extra support.
Fill Gaps and Seams
After installing all the pieces, use caulk to fill any gaps between the moulding and the wall or ceiling. This creates a seamless look and hides imperfections.
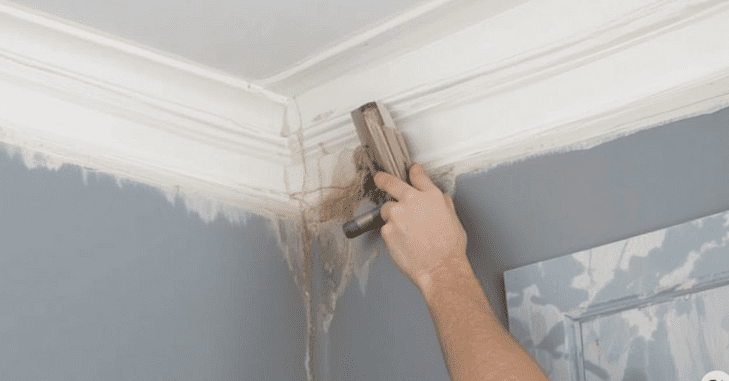
Finishing Touches
If any edges are rough or uneven, sand them down using fine-grit sandpaper for a smooth finish. If your crown moulding is not pre-finished, now is the time to paint or stain it. Use a paintbrush for accurate application, and allow the paint to dry completely before moving on.
Inspect the moulding for any missed spots or imperfections. Touch up any areas as needed to achieve a polished look.
Integrating Lighting with Crown Molding
For an added touch of sophistication, consider incorporating LED strip lighting behind your crown moulding. This subtle feature creates an ambient glow along the ceiling, enhancing the room’s atmosphere and highlighting architectural details. Flexible LED strips can be easily attached to the back edge of the molding, and dimmable options allow you to adjust the brightness according to the mood or occasion.
Not only does this technique elevate the aesthetic appeal of your space, but it also provides practical indirect lighting, reducing the need for harsh overhead fixtures and creating a warm, inviting environment.
Common Mistakes to Avoid
- Inaccurate Measurements: Double-check all measurements before cutting. Incorrect measurements can lead to wasted materials and a poor fit.
- Skipping the Primer: When painting your moulding, don’t skip the primer. The primer helps the paint adhere better and provides a more uniform finish.
- Neglecting to Use a Level: Always use a level to ensure your crown moulding is straight. An unlevel installation can be visually distracting.
- Rushing the Process: Take your time to ensure each step is done correctly. Rushing can lead to mistakes and a less professional finish.
Expert Tips for a Professional Finish
Here are some expert tips to help you achieve a professional look
Practice on Scrap Pieces
Before cutting your actual crown moulding, practice your cuts on scrap pieces to gain confidence in your technique.
Use Proper Lighting
Good lighting is essential for seeing details while measuring, cutting, and installing. Ensure your workspace is well-lit.
Keep a Damp Cloth Handy
Keep a damp cloth nearby to wipe away any excess glue or caulk before it dries. This will make cleanup easier.
Don’t Hesitate to Ask for Help
If you’re unsure about a step or need an extra pair of hands, don’t hesitate to ask a friend or family member for help.
Maintaining Crown Moulding for Long-Lasting Beauty
Proper maintenance helps crown molding retain its elegant appearance for years after installation. Regularly dust the molding with a microfiber cloth or soft brush to prevent dirt buildup, especially in detailed or decorative profiles. For painted molding, wipe away stains with a damp cloth and mild soap, avoiding harsh chemical cleaners that may damage the finish.
It’s also a good idea to inspect the joints and caulk lines periodically, particularly in rooms with changing humidity levels, as minor gaps can develop over time. Promptly touching up paint, repairing small cracks, and resealing joints when needed will keep the molding looking polished and protect it from unnecessary wear.
Conclusion
Installing crown moulding can be a rewarding DIY project that significantly enhances the beauty and value of your home. By following the steps outlined in this guide and using the right tools and techniques, you can achieve a professional look without needing to hire a contractor.
With careful preparation, accurate measurements, and a bit of patience, your new crown moulding will add elegance and charm to your space for years to come. Happy decorating!
Apart from that if you want to know about “The Ultimate Guide to Baseboard Installation: Tips, Tricks, and Techniques” then please visit our “Home Improvement” Category.
FAQs
Measure twice before cutting, use a mitre saw set at the correct angle, and test-fit pieces before installation.
For inside corners, use a coping saw for a tight fit. For outside corners, use a mitre saw set to the correct angles.
Yes, it’s best to nail into studs or use adhesive to provide extra support and prevent sagging.
Use caulk to fill small gaps and wood filler for nail holes, then sand and paint for a smooth finish.


