

Last Updated on March 2, 2024 by Asfa Rasheed
Global revenues in the music industry should hit $142 billion by 2030. Now, that crazy sum of money will come from a host of sources. But a significant chunk will be from people buying home recording equipment!
Thanks to improvements in tech and newly affordable prices, more people than ever are setting up personal studios and learning how to record music. You can make it more comfortable to get real plays for your music. Are you doing the same and want to get better at the craft?
Let us help. Check out these 5 top tips for recording music at home.
Table of Contents
1. Practice Makes Perfect
There’s a well-known theory that claims it takes at least 10,000 hours to become an expert at any particular activity. Keep that in mind as you start recording music at home! Don’t beat yourself up if your progress seems slow.
Keep at it. Embrace the process of trial and error. Experiment with different setups, equipment, and techniques, and learn as much as possible from expert online resources, such as multitrackhq.
2. Invest in a Preamp
Using a preamp is a simple “trick of the trade” that can deliver warmer sounds with greater volume and depth. Simply plug your microphone or guitar into this clever piece of home recording studio equipment first and away you go! The best part?
It’s cheap. You can pick one of these little gizmos up for a mere $50 and enjoy an instant boost to your sound quality. Top tip: an instrument cable will fit into the interface’s input, but it’s important to use a balanced audio cable (e.g. an XLR) to connect your preamp instead.
3. Your Microphone is Crucial
Want to record vocals? You’ll need a microphone! However, with countless models and styles to choose from, picking one is easier said than done.
For ease and convenience, a simple USB mic’s the way to go. They deliver reasonable sound quality without requiring any technical know-how. If you have an audio interface and want your tracks to sound more professional, though, an XLR microphone is the best bet.
4. Don’t Forget the Pop Shield
There’s nothing worse than listening back to a performance you just nailed and hearing a “popping” noise whenever you sang a plosive (i.e. words beginning with P or B) or breathed out too sharply! It spoils the entire track.
The best way to avoid that fate is to use a “pop shield”. Place this in front of your mic when recording vocals and you’ll stop the popping in its tracks.
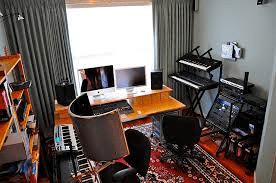
5. Consider the Space
Not all rooms are made equal for recording music at home! The decorations and furnishings make a big difference.
For example, putting carpet on the floor and covering the windows will help absorb the noise. Strip everything away (e.g. with wooden flooring) and you can expect a lively, active sound. Try to figure out the specific type of sound you’re looking for and then adorn your home recording studio setup accordingly.
Start Recording Music at Home
Recording music at home is more accessible than ever. With a few hundred bucks, you can set up your very own studio and start creating high-quality tracks! However, you have to know what you’re doing to start creating pro-level sounds.
We hope the tips in this post will help in that regard. Keep them in mind and you should be one step closer to getting your music career off the ground. Want to learn more about this creative topic?
Search “music” on the website now.
Apart from that, if you are interested to know about Story of a Multicultural Dancer and Musician then visit our Entertainment category.


